Draw A Car: Beginner-Friendly Guide & Easy Steps!
Have you ever dreamt of bringing your own automotive visions to life, even if just on paper? The ability to sketch a car, to capture its essence with a pencil, is a surprisingly accessible skill, one that opens a window to creativity and technical understanding. This guide will equip you with the fundamental techniques to embark on this exciting journey.
The allure of the automobile has captivated generations. From sleek sports cars to robust trucks, the design and form of these machines are a testament to human ingenuity. This guide will demystify the process of car sketching, offering a structured approach for both beginners and those looking to hone their skills. Forget complex perspectives and intricate details for now; we'll start with the basics, building a solid foundation for your artistic endeavors. This is not just about drawing; it's about understanding the principles of form, proportion, and how to translate your ideas onto paper. It will start with the fundamental building blocks.
Before we delve into the specifics of car drawing, let's equip ourselves with some essential tools. Gather a sharp pencil (a 2B or HB grade is ideal), a clean eraser, and a sheet of paper. The quality of your paper can impact the overall look. A smooth, heavier paper will be best. The tools are your companions on this creative journey.
Now, the process is broken down to steps and explained to help you understand it easily. Let's get started!
| Step | Description | Tips |
|---|---|---|
| 1 | The Foundation: The Rectangle. Begin by sketching a thin rectangle. The length of the rectangle dictates the overall length of your car. The width will determine how wide you want it to be. | Take the time to assess the proportions. A slightly longer rectangle often creates a more balanced look for a standard car. |
| 2 | Establishing the Body and Roof. After your initial rectangle, consider the shape of the car's roofline. Will it be a sleek coupe, a boxy SUV, or something in between? Lightly sketch in the roofline above the rectangle. | Don't make the roofline too dramatic at this stage. Simple curves work best for beginners. |
| 3 | Adding the Wheels. Indicate the positions of the wheels. Use circles or ovals, placed at the corners of the rectangle. | Consider the size of the wheels relative to the car's body. Bigger wheels can give the car a sportier look. |
| 4 | Refining the Body Outline. Use the roofline and rectangle as guides. Start sketching in the curves of the car's body. | Focus on smooth, flowing lines. Don't worry about perfection; this is a sketch. |
| 5 | Adding Windows and Details. Carefully place the windows. Theyre like the eyes of the car and give it a specific persona. Now is a good time to add some smaller details. | Add details like door handles, side mirrors, and any distinctive features. |
| 6 | The Final Touch: Wheels Detail. At this point you will add details to your wheels, this stage will add the real look to it, it will give a lot of perfection to your drawing. | Adding details like tires, rims, and any distinctive features can give a lot of perfection to your drawing. |
| 7 | Making it Realistic, perspective and shading. To make it more realistic, and to give a perspective to the drawing, work on shading. | Shading always enhances the drawings. |
| 8 | Consider the Perspective. Experiment with different viewing angles to give your drawing depth and realism. | Think about how the car would appear from different points of view, like from a high angle or a low angle. |
| 9 | Choosing Subjects. Look at real cars for inspiration and try to replicate their features. | Try sketching different car models, from easy to realistic, to enhance your drawing skills. |
| 10 | Adding Details. After completing the structure, begin adding details to the drawing. | Adding details to the drawing enhances your overall outcome. |
| 11 | Follow the Instructions. Follow the instructions step by step to create the car. | Doing this way will really make the car drawing easy for you to complete as you don't have to worry about making mistakes. |
| 12 | Finalize. When you're happy with how the lines look, go over them with your pen or a darker pencil. | When it comes to drawing anything, the smaller you draw it, the harder it gets. |
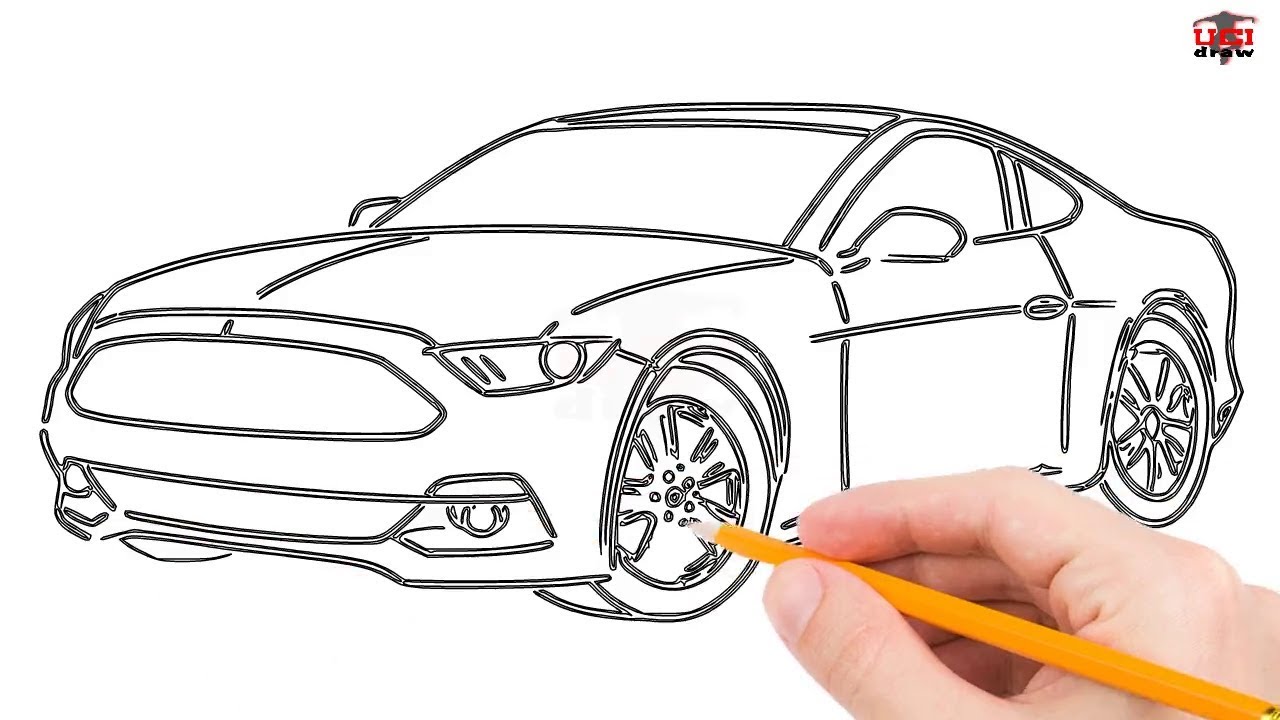
This is how you can draw the car step by step total 13 phases here, we create a car and it will be an easy tutorial. Grab a pencil and paper and follow along, perfect for beginners, kids, or anyone who loves to draw simple things.
Before you begin, its worth noting that the size of your drawing impacts the difficulty. The smaller the drawing, the harder it is to achieve detail and precision. Embrace the challenge and focus on enjoying the process, regardless of the final result. So, it's better to start with a bigger drawing.
Now that you have a fundamental understanding of car sketching, its time to experiment with different car models and styles. The world of automotive design is vast and varied, offering a wealth of inspiration. Consider the following:
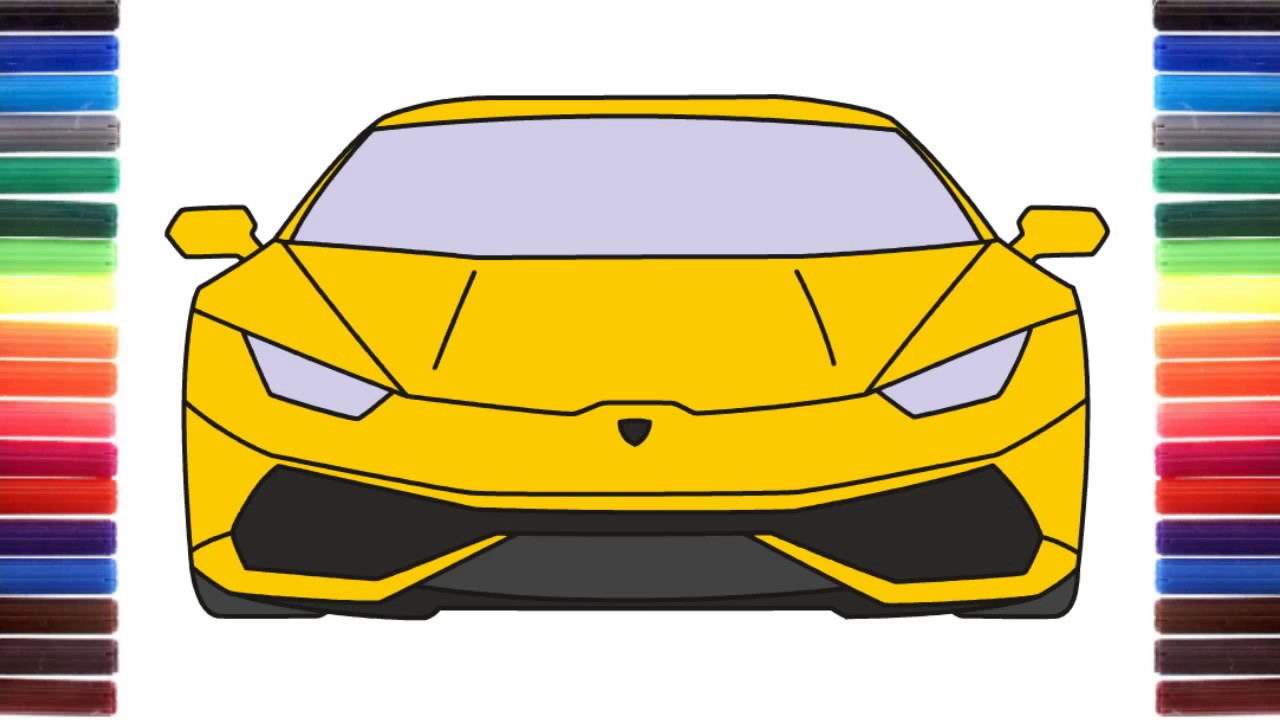
- Simplified Cartoon Cars: These are great for beginners. Focus on basic shapes and bold outlines.
- Classic Cars: Sketching vintage vehicles can be a fun challenge. Observe their unique curves and details.
- Modern Sports Cars: Their sleek designs can be exciting to replicate.
- SUVs and Trucks: These offer a different set of challenges, emphasizing their rugged and practical designs.
Remember that the goal is not to create perfect replicas, but to learn the fundamental principles of drawing and to develop your own artistic style. Dont be afraid to experiment with different techniques, perspectives, and shading methods. Finding the right tools is the next step. It's crucial for your creation.
One important element is shading. This simple technique can dramatically enhance the realism and depth of your car drawings.
- Understanding Light and Shadow: Observe how light interacts with the car's surfaces. Identify the highlights (areas where light hits directly) and the shadows (areas where light is blocked).
- Hatching and Cross-Hatching: Use parallel lines (hatching) or intersecting lines (cross-hatching) to create different tones and shading effects.
- Blending: Use your finger or a blending stump to soften the edges of your shading and create smoother transitions.
Once you've mastered the basics, you can explore more advanced techniques. Perspective is one of the most important elements for making your drawings look realistic.
- One-Point Perspective: All lines converge to a single vanishing point on the horizon line. Ideal for front or rear views.
- Two-Point Perspective: Two vanishing points, used to create more dynamic side views.
- Three-Point Perspective: Three vanishing points, for extreme angles, such as looking up or down at the car.
As you gain confidence, explore the world of car design. Observe real cars. Study their shapes, details, and proportions. This process will enhance your understanding and help you develop your own unique style. Start with simple shapes and lines, and gradually add details.
For those seeking further guidance and inspiration, numerous resources are available. Online tutorials, books, and workshops offer a wealth of knowledge and techniques. Some great resources include free PDF worksheets that walk you through the process step-by-step. There are also resources with more complex projects.
Remember, the most important ingredient for success is practice. The more you sketch, the better you will become. Dont be discouraged by mistakes; they are opportunities to learn and grow. The journey of car sketching is one of discovery and creative expression. Embrace the process, enjoy the challenge, and let your imagination take the wheel.
Here are some additional tips and tricks to help you along the way:
- Start Simple: Dont try to create a masterpiece on your first attempt. Begin with basic shapes and simple designs.
- Practice Regularly: Set aside time for drawing each day or week. Consistent practice is key to improving your skills.
- Observe Real Cars: Study the shapes, proportions, and details of actual vehicles. Use photos or real-life examples as reference.
- Use a Light Touch: Draw lightly at first, so you can easily erase and make corrections.
- Experiment with Different Styles: Explore various car models and design styles to broaden your creativity.
- Seek Feedback: Share your drawings with others and ask for constructive criticism.
- Dont Give Up: Drawing takes time and practice. Dont get discouraged if your first attempts arent perfect. Keep drawing and youll improve over time.
Mastering the art of car sketching is a journey, not a destination. Every sketch is a learning experience, a step toward honing your skills and expressing your creative vision. With patience, practice, and a little bit of passion, you'll soon be able to transform your ideas into stunning automotive illustrations.
Here is an example that will help you to draw car:
- Take a sharp pencil and lightly draw a long, narrow rectangle on your paper.
- The width of the rectangle will depend on how big you want to make your car drawing.
- In this drawing lesson, we'll show how to draw a car step by step total 13 phase here we create a car it will be easy tutorial.
- Perfect for beginners, kids, or anyone who loves to draw simple things. Grab a pencil and paper and follow along.
- Follow the illustrated examples and quick instructions to create your own car drawing in 12 steps.
- Learn how to draw different car models, from easy to realistic, with these pictured guides.
- Find tips, tricks, and examples for car sketching, perspective, shading, and more.
- Learn how to draw a car step by step with this printable guide.
- Follow the simple instructions and add details to create your own car drawing.
- That can really make this car drawing easy for you to complete, as you don't have to worry about making mistakes.
- When you're happy with how the lines look, you can then go over them with your pen or a darker pencil.
- When it comes to drawing anything, the smaller you draw it, the harder it gets.
- That's why for this car sketch we would
- Learn how to draw a car in nine simple steps with this lesson for kids.
- Choose from different car models, styles, and levels of difficulty, and get free pdf worksheets.
- Learn how to draw a simple car with basic shapes and colors in nine easy steps.
- Follow the outline and coloring instructions, or download the pdf guide for more fun.
- Learn how to draw cars with simple shapes and lines using this tutorial.
- Find tips on perspective, choosing subjects, shading, and enhancing skills.
This guide is just the beginning. With each sketch, with each attempt to capture the form and spirit of a car, you will grow as an artist and a creator. Embrace the challenge, enjoy the process, and let your imagination take the wheel.


